

Have you ever noticed how a poorly placed fixture light outdoor can make your space feel flat or uncomfortable? Many people skip planning and end up with harsh glare, low-quality fixtures, or miss out on highlighting unique outdoor features. You can avoid these issues by following the latest trends for 2026, like warm lighting, layered effects, and energy efficiency. Switching to LED lighting can save up to 75% on energy, making your outdoor area both beautiful and smart.
Thoughtful fixture light outdoor placement transforms your property. Before diving into the common mistakes, consider the long-term benefits of getting your lighting design right:
Benefit |
Description |
|---|---|
Enhanced Sustainability |
Eco-friendly materials and energy sources reduce your carbon footprint. |
Energy Efficiency |
Solar power and LED technology lower your energy use. |
Improved Safety and Security |
Smart lighting with motion sensors guides movement and deters intruders. |
Aesthetic Appeal |
Blending designs with nature creates beautiful outdoor spaces. |
Well-designed lighting adds value to your home and attracts buyers. |
Key Takeaways
Always create a lighting plan before installation. This ensures safety, enhances beauty, and highlights key features in your outdoor space.
Choose the right fixtures for each area. Match lighting intensity to the function, using brighter lights for pathways and softer lights for relaxation zones.
Incorporate layered lighting for depth and ambiance. Use different types of fixtures to create a balanced and inviting outdoor environment.
Regularly maintain your outdoor lighting system. Check for damage, clean fixtures, and inspect wiring to ensure safety and efficiency.
Select weatherproof fixtures to withstand outdoor conditions. This choice extends the life of your lighting and reduces the need for frequent replacements.
1. Skipping a Lighting Plan for Outdoor Spaces
Why a Plan Matters
You might feel tempted to buy a fixture light outdoor and install it right away, but skipping a plan can lead to disappointing results. Early planning for lighting helps you create a space that feels safe, beautiful, and welcoming. When you plan your lighting, you:
Reduce the risk of accidents by making sure pathways, stairs, and entryways stay visible at night.
Deter intruders by keeping dark corners well-lit.
Highlight unique features in your outdoor spaces, such as trees, sculptures, or water elements, turning them into focal points.
Extend the time you can enjoy your outdoor area, making it perfect for relaxing or entertaining after sunset.
A thoughtful lighting design does more than just brighten your yard. It sets the ambiance, improves safety, and brings out the best in your landscape lighting.
Steps for Effective Outdoor Lighting Design
You can create a successful lighting plan by following a few simple steps:
Start by looking at your entire outdoor area. Decide what kind of atmosphere you want. Think about how you want your spaces to flow from the garden to the patio and the home.
Map out the main functions for each area. For example, you might want bright lighting for cooking or eating, and softer lighting for relaxing.
Set aside at least 5% of your total garden design budget for lighting. This ensures you have enough resources for quality fixtures and installation.
Choose fixtures made from high-quality materials like brass. These resist corrosion and last longer in outdoor conditions.
Conceal most fixtures to keep the focus on the illumination, not the hardware. Use dark matte finishes to avoid unwanted reflections, except for decorative or string lights.
Check the IP rating on all fixtures to make sure they can handle water and dust.
Use LEDs for energy efficiency and long-lasting performance.
By planning your outdoor lighting design, you create a space that feels safe, looks beautiful, and works for every occasion.
2. Choosing the Wrong Fixture Light Outdoor
Matching Fixtures to Function
You want your outdoor lighting to do more than just brighten up your yard. The right fixture light outdoor can set the mood, improve safety, and highlight your favorite features. Start by thinking about how you use each area. For example, you need brighter lighting for outdoor kitchens and pathways, but softer lights work better for relaxing spaces or garden beds.
Tip: Use landscape lighting to draw attention to trees, sculptures, or water features. This adds depth and ambiance to your design.
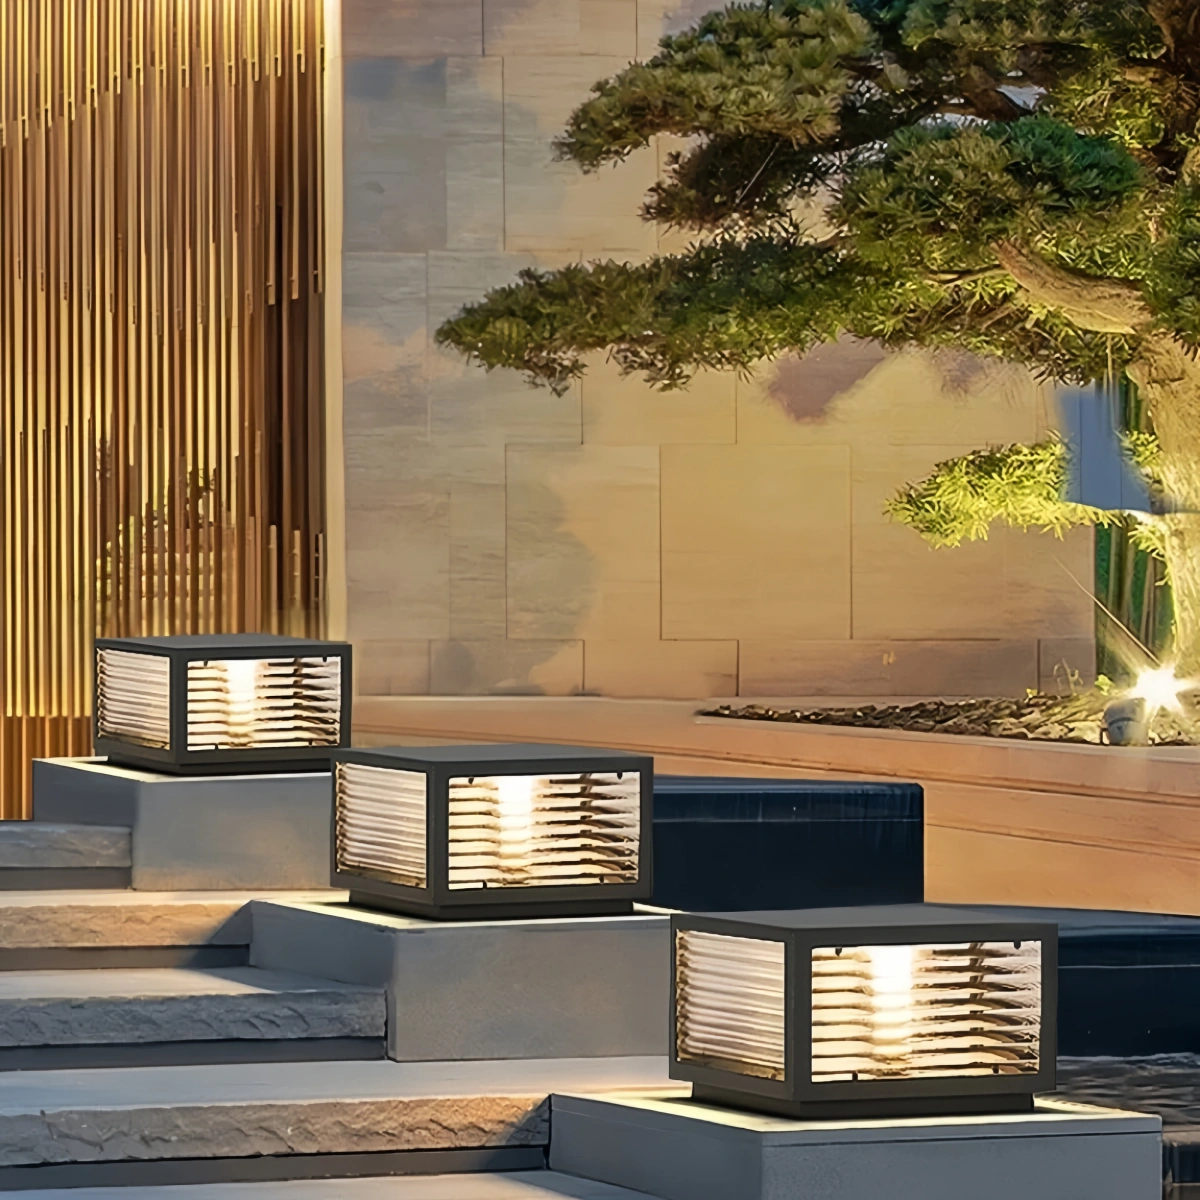
In 2026, you will see more integrated LED fixtures placed within pavers or along walkways. These lights create a natural glow and guide guests safely. Flush fixtures are also popular because they protect against damage and offer subtle, stylish guidance. Smart LED systems let you control color and brightness from your phone, so you can set the perfect scene for a dinner party or a quiet evening.
Understanding Beam Spread and Fixture Types
You should always choose a fixture based on the specific effect you want to achieve. Using a spotlight where a wash light is needed can create harsh glares instead of a soft glow. Consider these key types to match your design goals:
Spotlights (Narrow Beam): Perfect for highlighting tall, narrow features like statues, columns, or the trunks of tall trees.
Floodlights (Wide Beam): Best for illuminating large surfaces like exterior walls, driveways, or large retaining walls.
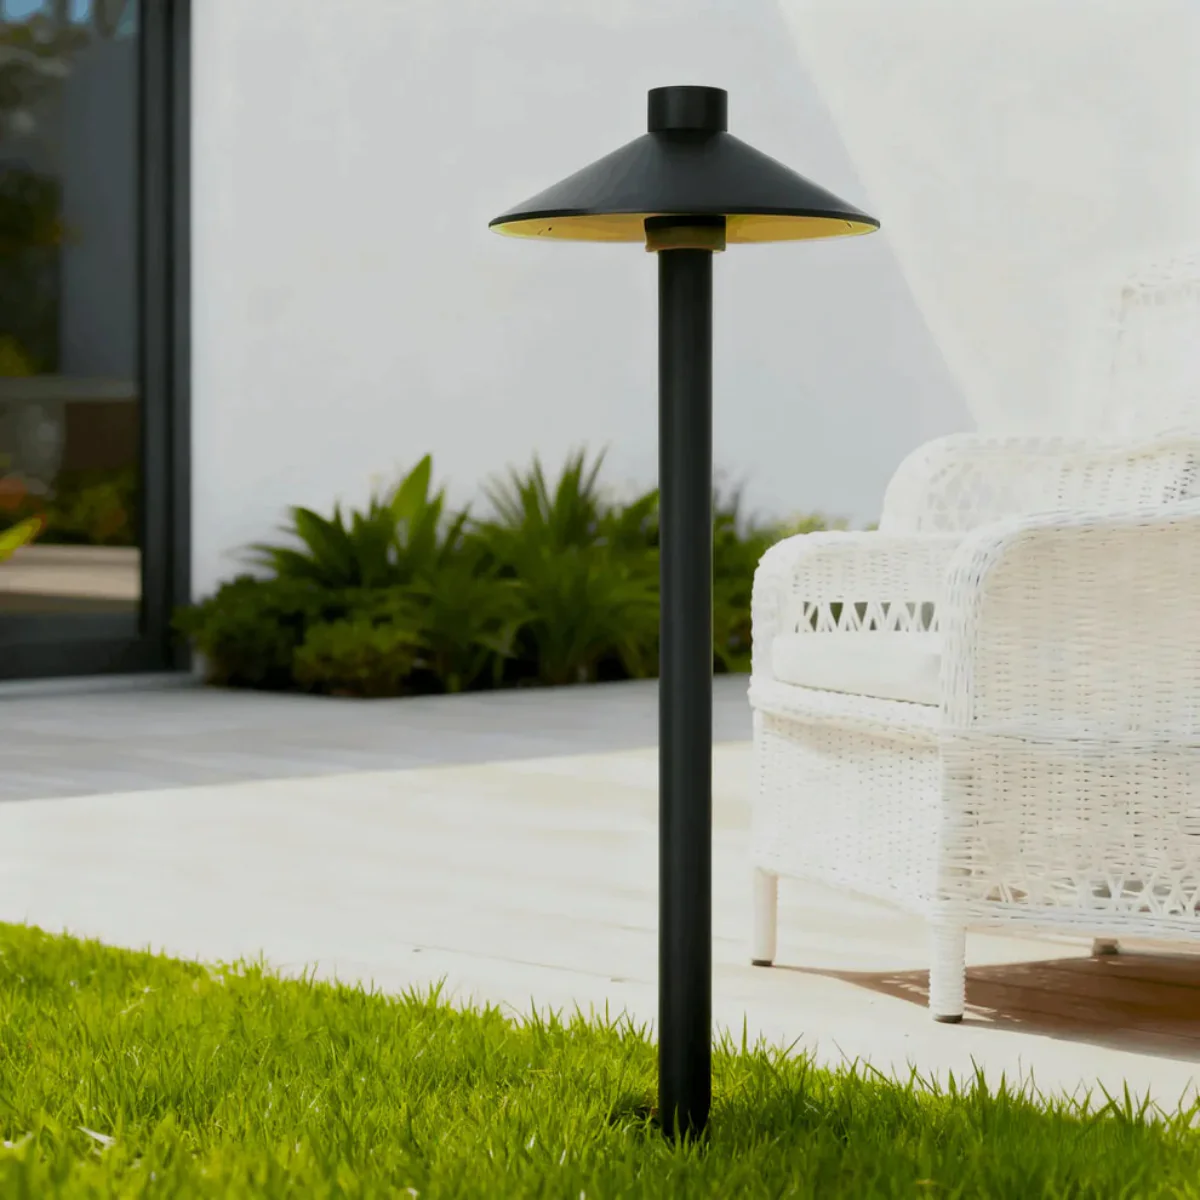
Path Lights: Designed with top shields to direct light downward. They are strictly for guiding steps and should never be used to light up garden beds or tall plants.
Well Lights (In-ground): Great for grazing textured walls or uplighting trees without showing the fixture itself.
By matching the exact type of fixture and its beam spread to your specific landscape feature, you create a cohesive and professional design rather than a mismatched collection of bright spots. Energy-efficient LEDs are now standard when selecting durable, efficient fixtures, ensuring your targeted lighting uses minimal power.
3. Overlooking Layered Outdoor Lighting
Benefits of Layered Lighting
You might think one fixture light outdoor is enough, but using only a single source often leaves your space looking flat and uninviting. Layered lighting brings out the best in your outdoor areas by combining different types of illumination. When you use lighting layers, you create a balanced and attractive environment that feels both safe and welcoming. Here are some key benefits you gain from using layered lighting in your design:
Enhanced aesthetics: Layered lighting transforms your garden into a picturesque scene. You highlight textures, colors, and shapes that might otherwise go unnoticed.
Improved functionality: Properly lit pathways and seating areas help you move around safely and enjoy outdoor activities after dark.
Increased security: Well-placed fixtures deter intruders by lighting up dark corners and entry points.
Extended living space: A well-lit garden or patio creates an inviting atmosphere for gatherings and relaxation.
Tip: Think of your outdoor lighting like the layers in a painting. Each layer adds depth and detail, making the whole scene come alive.
Combining Light Sources for Depth
You can achieve depth and visual interest by mixing different types of fixtures and lighting techniques. Understanding how light interacts with surfaces and textures helps you reveal hidden beauty in your landscape. Strategic lighting design does more than just provide illumination—it transforms your space.
Try these techniques to add dimension:
Grazing effect: Place a narrow beam fixture close to a wall or tree. Aim the light along the surface to highlight textures and create dramatic shadows.
Cross-lighting: Use fixtures to shine light from multiple angles on a feature like a statue or tree. This makes details stand out and gives a multi-dimensional look.
Shadow-casting: Position fixtures to project patterns or textures onto surfaces. This adds visual interest and makes your outdoor area feel dynamic.
When you combine these lighting layers, you avoid harsh, flat effects and instead create a space that feels rich and inviting. Your outdoor lighting becomes more than just functional—it becomes a key part of your home's personality.
4. Poor Fixture Placement and Spacing
Placement Rules for Outdoor Lighting
You can transform your outdoor space with the right fixture placement. If you place fixtures too close together, you create harsh spots and waste energy. If you space them too far apart, you leave dark gaps that reduce safety and beauty. In 2026, experts recommend following these guidelines for the best results:
Distance/Spacing |
Angle |
|
|---|---|---|
Path lights |
6 to 8 ft apart, staggered sides |
Downward |
Tree uplights (small) |
1 to 3 ft from trunk |
30 to 45 degrees up |
Tree uplights (large) |
3 to 6 ft from trunk, 2 to 3 fixtures |
30 to 45 degrees up |
Moonlights |
15 to 25 ft high in branches |
45 to 60 degrees down |
Facade uplights |
1 to 2 ft from foundation |
45 to 60 degrees up |
Wall grazing |
6 to 12 in from wall |
Nearly parallel to surface |
Hardscape lights |
18 to 24 in apart under caps |
Downward wash |
String lights |
8 to 10 ft above ground |
Draped in gentle arcs |
Tip: Use these distances as a starting point. Walk through your yard at night to see where you need more or less illumination.
Avoiding Overly Bright or Flat Effects
You want your outdoor lighting to feel natural and inviting. If you use the same angle and intensity everywhere, your space can look flat or even uncomfortable. Try these strategies to create a balanced look:
Adjust the beam angle for each fixture. Narrow beams give you focused, intense light for features like statues. Wide beams spread soft light over larger areas.
Mix different intensities. Use brighter fixtures for entrances and dimmer ones for relaxation zones.
Change the direction of your lighting. Shine some lights upward to highlight trees, and others downward for pathways.
Combine warm and cool tones to add depth and interest.
Varying the angle and intensity of your lighting helps you set the right mood. Soft, warm lights make your outdoor area cozy. Color-changing fixtures add excitement for special occasions. Strategic illumination highlights landscaping and adds dimension.
Note: You do not need to light every corner. Focus on key features and let shadows create contrast.
By following these placement rules and adjusting your lighting angles, you create an outdoor space that feels safe, beautiful, and full of life.
5. Ignoring Light Pollution and Glare Outdoors
Reducing Glare
Glare can make your outdoor spaces uncomfortable and even unsafe. You want your lighting to enhance visibility, not create harsh spots that hurt your eyes. You can reduce glare by following a few simple strategies:
Use only the amount of light you need in dark areas. Too much brightness can overwhelm your vision.
Dim your lights during late hours. This helps your eyes adjust and saves energy.
Control the intensity, number, size, and angle of your fixtures. Adjusting these factors lets you direct light where you need it most.
Mount LED string lights at or above eye level. This prevents direct exposure to bright bulbs.
Position lights to shine on surfaces indirectly. Indirect lighting creates a soft, welcoming effect.
Add shades or diffusers to your fixtures. Materials like frosted glass or fabric shades scatter light and reduce harshness.
Tip: Adding shades or diffusers not only softens brightness but also improves the look of your lighting design.
Preventing Light Spillover
Light spillover, also called light trespass, happens when lighting escapes your property and shines into neighboring yards. This can disturb your neighbors and harm local wildlife. You can prevent spillover by using the right fixtures and careful planning.
Strategy |
Description |
|---|---|
Choose path lights, low-voltage spotlights, and wall-mounted downlights designed for directional control. Avoid open-bulb fixtures. |
|
Aim Lights Carefully |
Adjust the angle of uplights and path lights to minimize spillover into neighboring properties. |
Control Brightness and Beam Spread |
Use low-lumen LEDs and narrow beam angles to reduce light pollution. |
Use Timers and Dimmers |
Set lights to turn off automatically and use motion sensors to limit unnecessary light. |
Embrace Dark Sky Principles |
Follow guidelines to minimize light pollution and preserve nighttime views. |
Create Natural Light Boundaries |
Use fences or hedges to confine light to your property. |
Test and Adjust After Dark |
Check lighting from various angles at night to ensure no light spills over into neighboring yards. |
You should also use glare shields or shrouds to focus light in the right direction. Always check your lighting from your neighbor’s point of view. This helps you spot and fix any unwanted spillover.
Excessive outdoor lighting can disrupt local ecosystems. Animals may become confused, which affects their sleep and feeding habits. Plants may also struggle with pollination and growth. By controlling glare and spillover, you protect both your safety and the environment.
6. Neglecting Outdoor Safety and Security
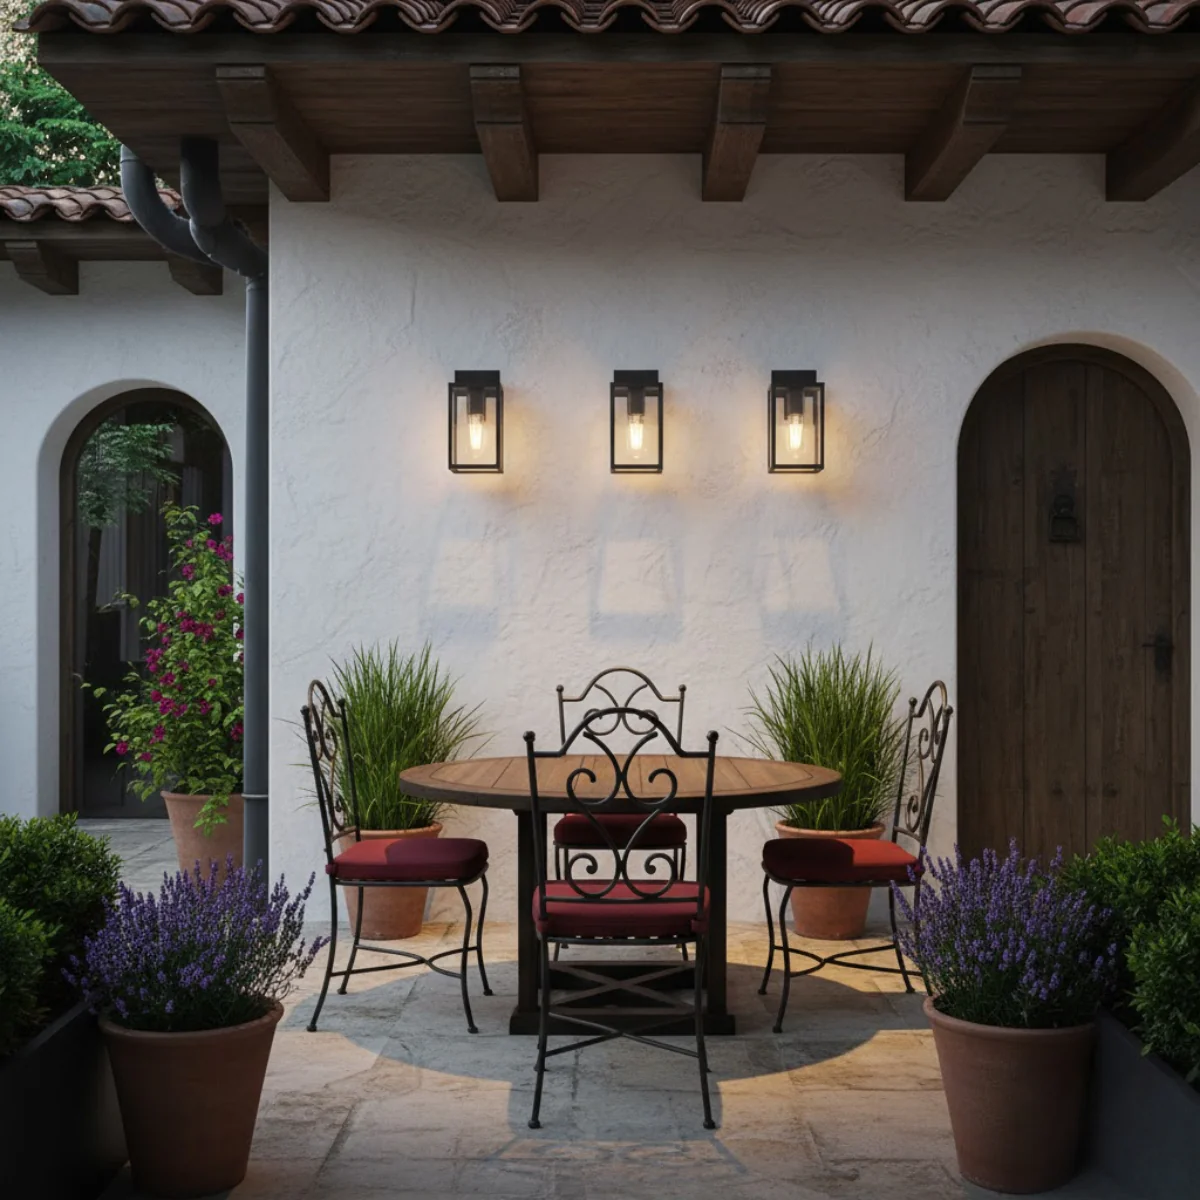
Lighting Pathways and Entrances
You want your home to feel safe and welcoming at night. Proper lighting along pathways and entrances helps you avoid accidents and makes your guests feel comfortable. Path lighting gives a soft, downward glow that marks the way without being harsh. You can use pathway lights for gentle illumination or bollard lights for a wider pool of light along driveways and walkways. In-ground fixtures sit flush with the ground and add a modern touch while keeping the area safe.
Consider these options for your pathways and entrances:
Solar lights offer easy installation and work well for quick upgrades in sunny yards.
Low-voltage LED systems provide brighter, more reliable illumination for most residential paths.
Mains voltage systems suit large commercial areas and require professional installation.
Power Type |
Installation Effort |
Brightness Consistency |
Best For |
|---|---|---|---|
Solar Path Lights |
Very Easy (DIY) |
Low to Medium |
Sunny yards, quick upgrades |
Low Voltage LED |
Moderate |
High and Reliable |
Most residential paths |
Mains Voltage |
Professional Only |
Very High |
Large commercial areas |
Strategic placement and warm-toned bulbs create a pleasant ambiance and highlight potential trip hazards. You eliminate dark spots and make every step safer.
Enhancing Security with Proper Placement
You can boost your home's security by placing lighting in the right spots. Well-lit areas around your home deter intruders and make unauthorized access less likely. When you install lighting thoughtfully, you remove dark corners where someone could hide. This increases visibility and gives you peace of mind.
A well-lit entrance not only welcomes guests but also signals that your home is cared for and protected.
Outdoor lighting around doors, garages, and side gates makes your property less appealing to criminals. You feel more confident when you approach your home at night. Use fixtures that direct light where you need it most, such as motion-activated lights near entrances or steady lights along fences. By focusing on safety and security, you create an outdoor space that feels both inviting and protected.
7. Using Incorrect Bulbs or Color Temperature
Best Bulbs for Outdoor Lighting
You want your outdoor spaces to feel safe, welcoming, and easy to use at night. Choosing the right bulbs for your fixtures makes a big difference. LED bulbs stand out as the best choice for outdoor lighting. They use much less energy than traditional bulbs and give you bright, crisp light. You can expect LED bulbs to last up to 25,000 hours. This means you will not need to replace them often, which saves you money and effort. LED bulbs also resist shock and vibrations, so they work well in outdoor conditions. When you compare LED bulbs to halogen bulbs, you see that LEDs last much longer and use less power. This reduces your electricity bills and helps the environment.
If you use the wrong bulbs, you may notice problems like glare, poor color rendering, or even unsafe conditions. The table below shows how improper color temperature choices can affect your outdoor space:
Lighting Issue |
Impact on Usability |
|---|---|
Distortion of material colors |
Can lead to confusion and misinterpretation of space at night |
Increased glare |
Causes discomfort and reduces visibility, affecting safety |
Poor color rendering |
Leads to hazy environments, increasing accident risks |
Excessively cool lighting |
Creates glare and harsh shadows, especially in seating areas |
Warm white lighting (Ideal) |
Improves visibility and enhances wayfinding, supporting relaxation |
Warm Lighting Trends for 2026
You can create a cozy and inviting atmosphere by following the latest trends in ambient lighting. In 2026, you will see more smart lighting systems that let you adjust the color and brightness of your fixtures for any occasion. Homeowners will use color-changing lights to match team colors or set the mood for special events. Solar-powered fixtures and eco-friendly energy sources will become more popular, making your outdoor space both stylish and sustainable.
Warm light tones will help you create comfortable settings for relaxing or entertaining. Cooler tones will work well for modern, lively gatherings. You can use ambient lighting to highlight paths, gardens, or seating areas. This approach gives your outdoor area a balanced look and supports both safety and comfort. By choosing the right bulbs and color temperatures, you make your outdoor lighting both beautiful and practical.
8. Forgetting Weather Resistance in Outdoor Fixtures
Choosing Weatherproof Fixtures
You need to choose weatherproof fixtures if you want your outdoor lighting to last. Rain, snow, and humidity can damage lights that are not built for tough conditions. Many people see their lights stop working after storms or notice cracks and rust on their fixtures. Water inside the bulbs or loose fixtures after strong winds are also common problems.
When you select fixtures, look for these important features:
Corrosion resistance, especially if you live near the coast or in a humid area.
Smart lighting technology that lets you adjust brightness and set schedules for different seasons.
Long-lasting, low-maintenance designs that reduce the need for frequent replacements.
Tip: Bronze fixtures resist corrosion and do not crack or peel. This makes them a smart choice for outdoor spaces with harsh weather.
Choosing Weatherproof Materials and Ratings
Choosing Weatherproof Materials and Ratings You need to choose weatherproof fixtures if you want your outdoor lighting to last. Rain, snow, and humidity can damage lights that are not built to match your local climate. Many people see their lights stop working after storms or notice cracks and rust on their fixtures.
When you select fixtures, you must pay attention to their environmental ratings and materials. Look for these important features:
High IP Ratings: Always check for a high IP rating, like IP65 or higher. This ensures the fixture is tightly sealed against both dust and water jets.
Durable Materials: Choose solid copper, powder-coated aluminum or brass. These metals resist corrosion, which is especially important if you live near the coast or in a humid area.
Impact and Temperature Resistance: If you live where snow or ice is common, select fixtures tested for extreme temperature drops and physical impacts.
Sealed Electrical Components: Make sure all wiring compartments and bulb housings have high-quality rubber gaskets to block moisture.
Tip: Bronze and brass fixtures naturally patina over time and do not crack or peel like cheap plastic or painted metals. This makes them a smart, long-lasting investment for outdoor spaces with harsh weather.
9. Over- or Under-Lighting Outdoor Areas
Finding the Right Light Levels
You want your outdoor spaces to feel comfortable and safe. Too much lighting can create harsh glare and waste energy. Too little lighting leaves areas dark and unsafe. You need to match the light level to each area’s purpose. For example, pathways require enough brightness for safe walking, while patios need softer light for relaxing.
Note: Lighting professionals measure this brightness in foot-candles (fc). Simply put, 1 fc is the amount of light one candle casts on a surface one foot away. For residential outdoor areas, 1 fc usually requires a fixture outputting roughly 10 to 15 lumens per square foot.
The table below shows recommended light levels for common outdoor areas:
Outdoor Area |
Recommended Light Level |
|---|---|
Pathways |
1 fc (10 fc for areas with stairs) |
Driveways |
5 fc |
Patio/Porch |
6 fc for sitting, 15 fc for dining |
Parks/Gardens |
1 fc (15 fc for amusement parks) |
You can use this guide to select the right fixtures and bulbs. If you follow these levels, you avoid over-lighting and under-lighting. You create a space that feels balanced and inviting.
Tip: Walk through your yard at night and notice where you need more or less light. Adjust your fixtures to match each area’s needs.
Adjusting for Different Zones
You can divide your outdoor space into zones. Each zone has its own lighting needs. For example, you highlight your home’s architecture with focused fixtures. You light pathways and walkways for safety and style. You showcase plants and landscape features with creative lighting. You create inviting spaces for social gatherings with functional lighting.
Architectural and Foundation Zone: Use fixtures to highlight your home’s beauty.
Pathway and Walkway Zone: Place lighting along steps and paths for safety.
Garden and Landscape Zone: Add fixtures to show off plants and landscape features.
Social and Entertainment Zone: Use lighting to make gathering spaces comfortable.
When you layer different types of lighting, you add depth and visual interest. You spotlight key features like trees or water elements. You set the mood for each area. If you adjust your fixtures for each zone, you make your outdoor lighting both practical and beautiful.
10. Skipping Regular Outdoor Maintenance
Why Maintenance Matters
You might think your outdoor lighting will last for years without attention. In reality, skipping regular maintenance can cause many problems. Your lights may stop working as well, and your yard can start to look messy. You lose both safety and enjoyment when your lighting system fails.
Neglecting maintenance often leads to lights that do not function or look good.
Small problems can grow into bigger issues, which means you may need expensive repairs or even a full replacement.
You spend more money over time if you ignore upkeep, as small fixes turn into major costs.
Regular care keeps your lighting energy efficient and helps keep your home safe at night.
You protect your investment and keep your outdoor spaces bright and welcoming when you check your lighting often.
Simple Outdoor Lighting Checklist
You can keep your outdoor lighting in top shape with a few easy steps. Use this checklist and schedule to make sure your system works well all year:
Clean fixtures regularly (Every 3-6 months): Turn off the power, wipe away dirt, hard water stains, and debris with a soft cloth. Let everything dry before turning the lights back on.
Trim plants and bushes: Overgrown branches can block light, alter your beam spread, or even damage fixtures during high winds.
Inspect wires and connections: Look for frayed wires or loose parts. Fix any problems right away to prevent electrical hazards.
The table below shows how to protect each part of your lighting system during your maintenance routine:
Component |
Maintenance / Protection Method |
Benefit |
|---|---|---|
Fixtures |
Clean lenses, check rubber seals, elevate bases from mud |
Prevents water damage and keeps light output bright |
Wiring |
Check buried cables after heavy rain, ensure conduit is intact |
Reduces corrosion and short-circuit risks |
Transformer |
Keep the weatherproof enclosure free of debris and spider webs |
Extends equipment life and prevents overheating |
When you follow these steps, you avoid costly repairs and keep your outdoor space looking its best. Regular maintenance does not take much time, but it saves you money and trouble in the long run.
Tip: Set a reminder on your phone to check your outdoor lighting at the start of every season. This simple habit helps you catch small issues before they become big problems.
Thoughtful fixture light outdoor placement does more than just banish the dark—it frames architectural details and draws attention to your yard’s best features. By avoiding these common mistakes, you improve safety, deter intruders, and set your home apart with incredible curb appeal. Remember to use a plan before you update your lighting, inspect your system every few months, and adjust fixtures as seasons change to keep your outdoor space safe, efficient, and beautiful.
FAQ
What is the best color temperature for outdoor lighting?
You should choose warm white (2700K–3000K) for most outdoor spaces. This range creates a cozy, inviting atmosphere. Cooler tones work well for security or modern designs. Always match the color temperature to your desired mood and function.
How often should you check your outdoor lighting system?
Check your outdoor lights every season. Look for dirt, damage, or loose wires. Clean fixtures and trim plants nearby. Regular checks help you catch problems early and keep your lighting safe and bright.
Can you install outdoor lighting yourself?
You can install solar and low-voltage LED lights yourself. These options are safe and simple for most homeowners. For mains voltage systems or complex designs, hire a licensed electrician to ensure safety and code compliance.
How do you prevent outdoor lights from attracting bugs?
Use LED bulbs with warm color temperatures. These attract fewer insects than cool or bright white lights. Place fixtures away from doors and seating areas. You can also use yellow “bug lights” for patios.
What is the ideal spacing for pathway lights?
Space pathway lights 6 to 8 feet apart. Stagger them on both sides for even coverage. This spacing provides safe, attractive illumination without creating harsh spots or dark gaps.


