

Es kann ärgerlich sein, wenn man bemerkt, dass das Licht zu Hause nicht funktioniert. Viele Menschen erleben jeden Tag, dass das Licht nicht funktioniert oder andere Beleuchtungsprobleme auftreten. Meistens kann man diese Probleme mit einfachen Schritten beheben.
Sicherheitstipp: Schalten Sie immer den Strom ab, bevor Sie etwas Elektrisches überprüfen. Gehen Sie niemals ein Sicherheitsrisiko ein.
Wichtige Erkenntnisse
Schalten Sie immer zuerst den Strom ab. Das schützt Sie, wenn Sie elektrische Teile überprüfen. Beginnen Sie damit, die Glühbirne und die Fassung zu überprüfen. Setzen Sie eine neue Glühbirne ein, wenn die alte durchgebrannt ist. Reinigen Sie die Fassung, wenn Sie Rost oder Schmutz sehen. Wenn das Licht immer noch nicht funktioniert, überprüfen Sie den Schalter auf Beschädigungen. Verwenden Sie ein Multimeter, um den Schalter zu testen.
Fehlerbehebung bei nicht funktionierendem Licht
Wenn Sie bemerken, dass Ihr Licht nicht funktioniert, können Sie ein paar einfache Schritte befolgen, um die Ursache zu finden. Beginnen Sie mit den einfachsten Überprüfungen, bevor Sie zu komplexeren Fehlerbehebungen übergehen. Dieser Ansatz hilft Ihnen, sicher zu bleiben und unnötige Reparaturen zu vermeiden.
Überprüfen Sie Glühbirne und Fassung
Sie sollten immer zuerst die Glühbirne überprüfen. Eine durchgebrannte Glühbirne ist einer der häufigsten Gründe, warum ein Licht nicht funktioniert. Schalten Sie den Strom ab und entfernen Sie die Glühbirne. Suchen Sie nach einem dunklen oder gebrochenen Glühfaden im Inneren. Wenn Sie eine Beschädigung sehen, ersetzen Sie die Glühbirne durch eine neue.
Sie können die Glühbirne auch überprüfen, indem Sie sie in eine andere funktionierende Fassung einsetzen. Wenn sie nicht leuchtet, wissen Sie, dass die Glühbirne das Problem ist. Wenn die Glühbirne in einer anderen Fassung funktioniert, liegt das Problem möglicherweise an der Fassung oder der Verkabelung.
Tipp: Verwenden Sie einen Spiegel oder die Kamera Ihres Telefons, um schwer einsehbare Fassungen zu überprüfen.
Als Nächstes überprüfen Sie die Fassung. Stellen Sie sicher, dass sie sauber und korrosionsfrei ist. Wenn Sie grüne oder weiße Ablagerungen sehen, reinigen Sie diese vorsichtig mit einem trockenen Tuch. Sie können auch einen Tester verwenden, um die Stromversorgung an der Fassung zu überprüfen. Schalten Sie den Schalter ein und berühren Sie mit dem Tester die Kontakte der Fassung. Wenn der Tester aufleuchtet, hat die Fassung Strom. Wenn nicht, liegt das Problem möglicherweise woanders.
Hier ist eine Tabelle, die die durchschnittliche Lebensdauer gängiger Glühbirnen zeigt:
Typ |
Durchschnittliche Lebensdauer |
|---|---|
Glühlampe |
1.000 - 1.500 Stunden |
Kompaktleuchtstofflampe |
6.000 - 15.000 Stunden |
LED |
25.000 - 50.000 Stunden |
Wenn Ihre Glühbirne das Ende ihrer Lebensdauer erreicht hat, ersetzen Sie sie, auch wenn sie noch intakt aussieht.
Überprüfen Sie den Schalter
Wenn Glühbirne und Fassung in Ordnung zu sein scheinen, überprüfen Sie den Schalter. Manchmal kann ein defekter Schalter dazu führen, dass ein Licht nicht funktioniert. Betätigen Sie den Schalter. Achten Sie auf Knister- oder Brummgeräusche. Fühlen Sie, ob der Schalter warm oder heiß ist. Diese Anzeichen können auf lockere Verbindungen oder eine Überlastung hindeuten.
Häufige Anzeichen eines defekten Schalters sind:
Schwierigkeiten beim Bewegen des Schalters oder er fühlt sich locker an
Verfärbungen oder Brandspuren um den Schalter
Ungewöhnliche Gerüche, insbesondere Brandgeruch
Verzögerung beim Einschalten des Lichts
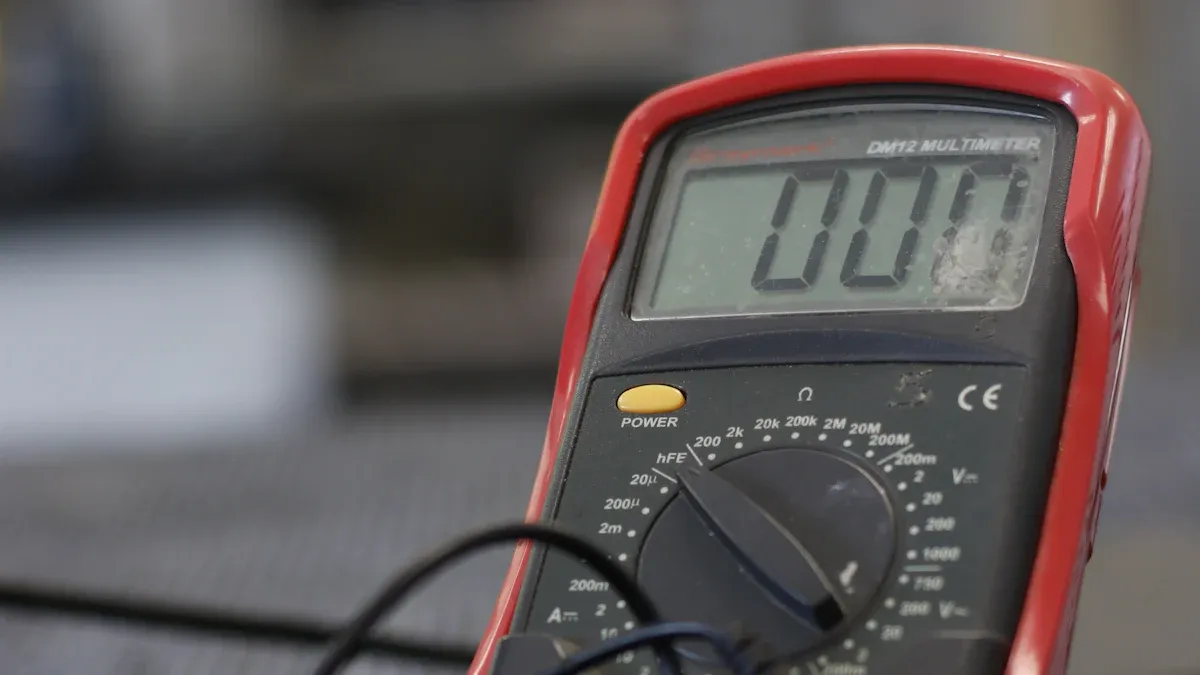
Sie können ein Multimeter verwenden, um den Schalter zu testen. Stellen Sie das Multimeter auf Durchgangsmodus ein. Berühren Sie einen Messfühler mit dem gemeinsamen Anschluss und den anderen mit dem Heißdrahtanschluss. Wenn Sie einen Piepton hören oder einen niedrigen Wert sehen, funktioniert der Schalter. Wenn nicht, müssen Sie den Schalter möglicherweise ersetzen.
Hinweis: Wenn Sie Rauch sehen oder Brandgeruch wahrnehmen, halten Sie an und rufen Sie sofort einen Fachmann.
Sicherung zurücksetzen
Wenn die Glühbirne und der Schalter nicht das Problem sind, sollten Sie den Sicherungsautomaten überprüfen. Manchmal kann ein ausgelöster Sicherungsautomat dazu führen, dass ein Licht nicht funktioniert. Gehen Sie zu Ihrem Sicherungskasten und suchen Sie nach Sicherungsautomaten in der "Aus"- oder mittleren Position.
Befolgen Sie diese Schritte, um den Sicherungsautomaten zurückzusetzen:
Schalten Sie alle Lichtschalter aus und ziehen Sie die Stecker von Geräten in den betroffenen Räumen ab.
Öffnen Sie die Abdeckung des Sicherungskastens.
Suchen Sie den ausgelösten Sicherungsautomaten.
Bewegen Sie den Sicherungsautomaten ganz auf "Aus" und dann wieder auf "Ein".
Überprüfen Sie, ob das Licht funktioniert.
Wenn der Sicherungsautomat erneut auslöst, liegt möglicherweise eine Überlastung oder ein Verkabelungsproblem vor. In diesem Fall rufen Sie einen qualifizierten Elektriker.
Sicherheitstipp: Niemals einen Sicherungsautomaten erzwingen, der sich nicht zurücksetzen lässt. Das kann gefährlich sein.
Suchen Sie nach Brandspuren oder losen Verbindungen
Wenn Ihr Licht immer noch nicht funktioniert, suchen Sie nach Brandspuren oder losen Verbindungen. Angebrannte Isolierungen oder Verfärbungen um die Leuchte oder die Kabel können auf Überhitzung hindeuten. Lose Klemmen oder Verbindungen verursachen oft flackerndes Licht oder einen vollständigen Ausfall.
Häufige Anzeichen, auf die Sie achten sollten:
Flackerndes oder gedimmtes Licht
Ungewöhnliche Gerüche, insbesondere Brandgeruch
Lose Kabel oder Klemmen
Brandspuren an der Leuchte oder Wand
Lose Verbindungen sind eine häufige Ursache für Beleuchtungsausfälle. Sie können den Stromfluss unterbrechen und Sicherheitsrisiken verursachen. Wenn Sie eines dieser Anzeichen finden, halten Sie an und rufen Sie einen Fachmann. Versuchen Sie nicht, Verdrahtungsprobleme selbst zu beheben.
Regelmäßige Inspektionen helfen Ihnen, Probleme frühzeitig zu erkennen und Ihr Zuhause sicher zu halten.
Häufige Ursachen für nicht funktionierendes Licht
Viele Dinge können dazu führen, dass ein Licht in Ihrem Haus nicht funktioniert. Hier sind einige der häufigsten Ursachen:
Empfindlichkeit der Glühbirne gegenüber Wetterbedingungen
Veraltete Beleuchtungssysteme, die ersetzt werden müssen
Freiliegende oder durchtrennte Kabel, die Sicherheitsrisiken darstellen
Defekte Teile im Beleuchtungssystem
Durch Befolgen dieser Schritte können Sie die meisten Probleme mit nicht funktionierendem Licht sicher und schnell beheben. Denken Sie immer daran, die Glühbirne zu überprüfen, den Schalter anzusehen und den Sicherungsautomaten zu überprüfen, bevor Sie zu komplexeren Fehlerbehebungen übergehen.
Fortgeschrittene Reparaturen und wann Sie Hilfe rufen sollten
Leuchte und Verkabelung testen
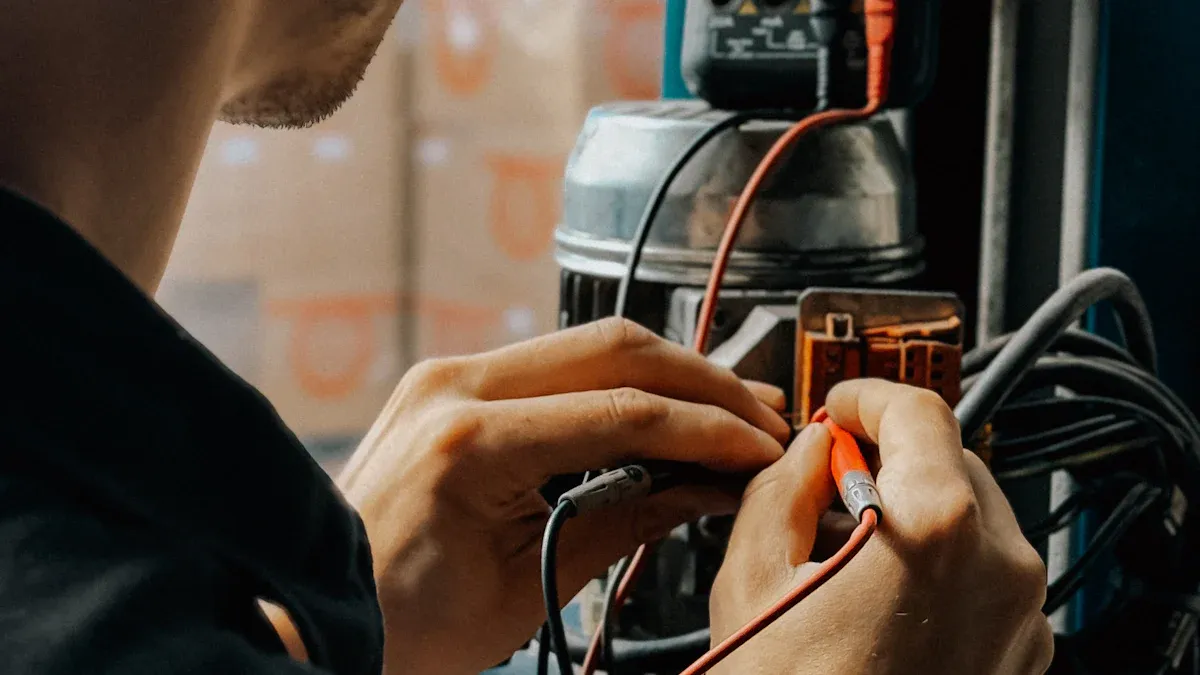
Wenn Sie die einfachen Schritte ausprobiert haben und Ihr Licht immer noch nicht funktioniert, müssen Sie genauer hinsehen. Schalten Sie zuerst den Strom ab. Verwenden Sie eine Taschenlampe, um die Leuchte und die Kabel zu überprüfen. Suchen Sie nach Beschädigungen, losen Kabeln oder Rost. Sie können einen Spannungsprüfer oder ein Multimeter verwenden, um die Stromversorgung zu überprüfen. Testen Sie verschiedene Stellen, um zu sehen, wo der Strom unterbrochen wird. Sie sollten auch den Schalter auf Durchgang prüfen. Stellen Sie Ihr Multimeter auf Durchgangsmodus ein. Überprüfen Sie sowohl den heißen als auch den neutralen Draht. Wenn kein Durchgang vorhanden ist, könnte die Verkabelung oder die Leuchte defekt sein. In älteren Häusern können flackernde Lichter oder tote Steckdosen bedeuten, dass zu viel Strom auf einem Stromkreis liegt oder die Verkabelung schlecht ist. Diese Probleme können zu Stromstößen oder sogar Bränden führen.
⚠️ Versuchen Sie keine schwierigen elektrischen Reparaturen ohne Schulung. Sie könnten einen Stromschlag erleiden, sich verbrennen oder einen Brand verursachen. Rufen Sie immer einen zugelassenen Elektriker, wenn Sie unsicher sind.
Dimmer- und Glühbirnenkompatibilität
Manchmal funktioniert Ihr Licht nicht, weil der Dimmer und die Glühbirne nicht zusammenpassen. Überprüfen Sie immer, ob Ihr Dimmer mit Ihrer Glühbirne kompatibel ist, bevor Sie neue Glühbirnen einsetzen. Hier ist eine Kurzanleitung:
Glühbirnentyp |
Hinweise zur Dimmerkompatibilität |
|---|---|
Glühlampe |
Funktioniert mit den meisten Dimmern. |
LED |
Benötigt einen für LED-Glühbirnen geeigneten Dimmer. |
Halogen |
Benötigt möglicherweise einen Dimmer mit höherer Wattzahl. |
Leuchtstofflampe |
Das Dimmen ist schwierig; ziehen Sie in Betracht, auf LED umzusteigen, um bessere Ergebnisse zu erzielen. |
Wenn Sie Blinken, Flackern, Brummen oder Glühbirnen sehen, die nicht richtig dimmen, passen Ihr Dimmer und Ihre Glühbirne möglicherweise nicht zusammen.
Anzeichen, dass Sie einen Elektriker brauchen
Rufen Sie einen Fachmann, wenn Sie diese Warnzeichen bemerken:
Lichter flackern oder werden immer schwächer
Sie riechen Brandgeruch in der Nähe von Steckdosen oder Schaltern
Steckdosen fühlen sich warm an oder funken
Schalter machen Brummgeräusche
Geräte fallen oft aus
Wenn Sie diese Probleme ignorieren, könnten Sie sich verletzen, einen Brand verursachen oder teure Schäden erleiden. Die Hausratversicherung schreibt in der Regel vor, dass Reparaturen von einem zugelassenen Elektriker durchgeführt werden müssen. Wenn Ihr Licht immer noch nicht funktioniert, riskieren Sie nicht Ihre Sicherheit – rufen Sie einen Experten.
Sie können grundlegende Fehlerbehebungen bei der Beleuchtung mit Zuversicht durchführen, wenn Sie die Sicherheitsschritte befolgen. Schalten Sie immer den Strom ab und verwenden Sie die richtigen Werkzeuge. Führen Sie eine einfache Checkliste zur Pflege der Beleuchtung:
Häufigkeit |
Aufgabe |
|---|---|
Wöchentlich |
Leuchten abstauben, Glühbirnen prüfen |
Monatlich |
Lose Kabel überprüfen |
Regelmäßige Kontrollen helfen, Probleme zu vermeiden und Ihr Zuhause sicher zu halten.
FAQ
Warum flackert mein Licht manchmal?
Flackerndes Licht deutet oft auf lose Verbindungen oder eine defekte Glühbirne hin. Sie sollten zuerst die Glühbirne und die Fassung überprüfen. Wenn das Flackern anhält, rufen Sie einen Elektriker.
Kann ich die Fehlersuche bei nicht funktionierendem Licht selbst durchführen?
Sie können grundlegende Fehlerbehebungen wie das Überprüfen von Glühbirnen und Schaltern selbst durchführen. Schalten Sie immer den Strom ab, bevor Sie beginnen. Bei Verdrahtungsproblemen sollten Sie einen Fachmann kontaktieren.
Welche Werkzeuge benötige ich, um eine Leuchte zu überprüfen?
Sie benötigen einen Schraubendreher, einen Spannungsprüfer und eine Taschenlampe. Diese Werkzeuge helfen Ihnen, Glühbirnen, Fassungen und Schalter sicher zu überprüfen.


